
As electronic devices become more advanced and interconnected, ensuring they do not interfere with other electronic equipment has become a critical part of product development. The EMI testing procedure is a standardized process used to measure the electromagnetic interference generated by electronic products and verify compliance with international regulations before they enter the market.
Whether you're designing consumer electronics, industrial equipment, automotive systems, medical devices, or wireless products, following the correct EMI testing procedure helps avoid costly redesigns, certification failures, and market delays.
This guide explains every stage of EMI testing, from planning and preparation to final certification.
What Is EMI Testing?
Electromagnetic Interference (EMI) testing evaluates the unwanted electromagnetic emissions produced by an electronic device. Every electronic product generates electromagnetic energy while operating. If these emissions exceed regulatory limits, they can disrupt nearby equipment such as communication systems, medical devices, computers, or industrial machinery.
EMI testing measures these emissions to ensure they remain within acceptable limits established by regulatory agencies.
The primary goals of EMI testing are to:
Verify regulatory compliance
Prevent interference with nearby electronics
Improve product reliability
Reduce redesign costs
Enable successful product certification
Why Is the EMI Testing Procedure Important?
Ignoring EMI compliance can lead to significant business risks, including:
Product certification failure
Regulatory fines
Product recalls
Delayed product launches
Customer complaints
Increased engineering costs
Damage to brand reputation
A structured testing procedure identifies potential electromagnetic issues early, allowing engineers to resolve problems before mass production.
Step-by-Step EMI Testing Procedure
Step 1: Identify Applicable Standards
Before testing begins, determine which EMC or EMI standards apply to your product.
Common standards include:
FCC Part 15 (United States)
CISPR 11
CISPR 14
CISPR 22 (Legacy)
CISPR 32
EN 55032
EN 55035
IEC 61000 Series
MIL-STD-461
Automotive EMC standards
Medical device EMC standards
The applicable standard depends on:
Product category
Intended environment
Target market
Voltage rating
Communication technologies
Selecting the correct standard is the foundation of the entire testing process.
Step 2: Review Product Design
Before laboratory testing, engineers perform an engineering review to identify potential EMI sources.
Areas evaluated include:
PCB layout
Grounding strategy
Shielding design
Power supply filtering
Cable routing
Clock frequencies
Switching regulators
High-speed digital circuits
Good design practices significantly reduce the likelihood of failing compliance testing.
Step 3: Conduct Pre-Compliance Testing
Pre-compliance testing is performed during product development rather than after the design is finalized.
This stage helps engineers identify excessive emissions before investing in formal certification testing.
Typical pre-compliance equipment includes:
Spectrum analyzers
Near-field probes
LISNs (Line Impedance Stabilization Networks)
EMI receivers
Current probes
Antennas
Oscilloscopes
Finding problems early saves both time and development costs.
Step 4: Prepare the Equipment Under Test (EUT)
The product being tested is known as the Equipment Under Test (EUT).
Proper preparation includes:
Installing production firmware
Connecting all required peripherals
Using representative cables
Operating under worst-case conditions
Running maximum processing loads
Activating all communication interfaces
The EUT must represent how customers will actually use the product.
Step 5: Configure the Test Environment
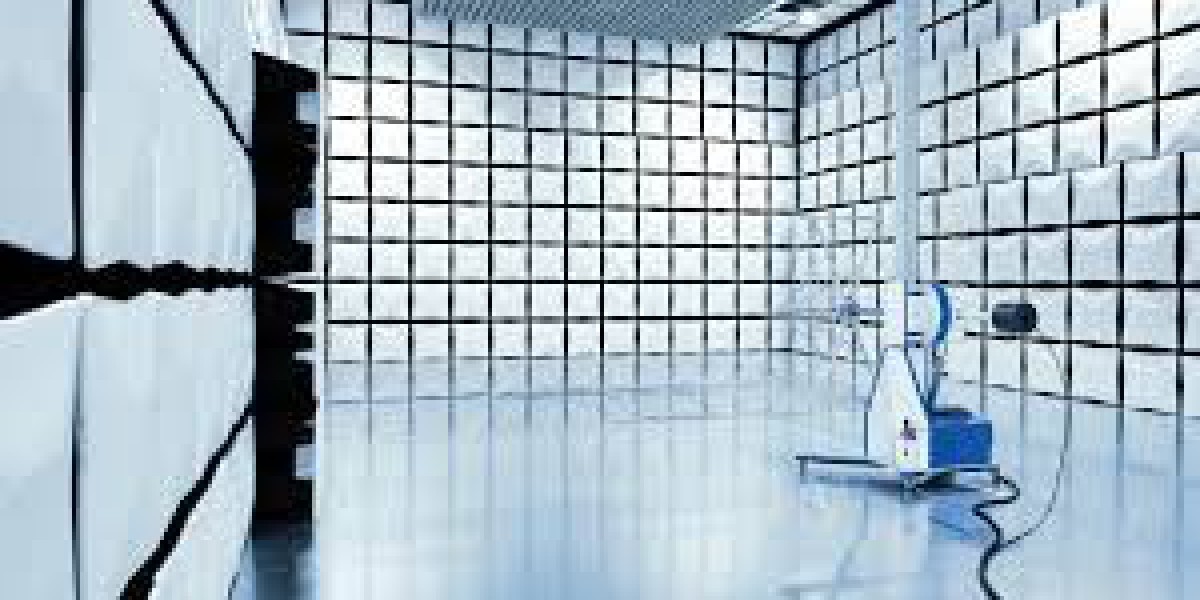
EMI testing takes place in specialized laboratories designed to eliminate external electromagnetic noise.
Common test environments include:
Semi-anechoic chambers
Fully anechoic chambers
Open Area Test Sites (OATS)
Shielded rooms
Conducted emission test benches
These environments provide accurate and repeatable measurement conditions.
Step 6: Perform Conducted Emissions Testing
Conducted emissions testing measures unwanted electrical noise traveling through power and signal cables.
During this procedure:
The EUT is connected through a LISN.
Emissions are measured over the required frequency range.
Engineers compare measured levels against regulatory limits.
Typical conducted emissions frequency range:
150 kHz to 30 MHz
Products with switching power supplies often require special attention during this phase.
Step 7: Perform Radiated Emissions Testing
Radiated emissions testing measures electromagnetic energy emitted through the air.
The procedure typically includes:
Positioning the EUT on a rotating table.
Adjusting antenna height.
Measuring emissions at multiple orientations.
Recording maximum emission levels.
Comparing results with applicable limits.
Typical radiated emissions frequency ranges include:
30 MHz–1 GHz
1 GHz–6 GHz
Above 6 GHz for wireless products, depending on the applicable standard
This is often the most challenging portion of EMI compliance testing.
Step 8: Analyze Test Results
After measurements are complete, engineers review:
Peak emissions
Average emissions
Quasi-peak measurements
Margin to regulatory limits
Frequency plots
Repeatability
If all emissions remain below specified limits, the product passes the EMI portion of compliance testing.
Step 9: Troubleshoot Failures (If Required)
If the product exceeds emission limits, engineers perform EMI debugging.
Common corrective actions include:
Adding ferrite beads
Improving PCB grounding
Installing EMI filters
Increasing shielding
Optimizing cable routing
Slowing signal edge rates
Redesigning switching circuits
Modifying enclosure design
The product is then retested until compliance is achieved.
Step 10: Final Compliance Testing
Once all engineering improvements have been completed, the product undergoes official compliance testing at an accredited laboratory.
Formal testing follows the exact procedures defined by the applicable standard.
Successful completion allows manufacturers to proceed with product certification.
Equipment Used During EMI Testing
Professional EMI laboratories commonly use:
EMI receivers
Spectrum analyzers
Broadband antennas
Biconical antennas
Log-periodic antennas
Horn antennas
LISNs
Current probes
Near-field probes
Signal generators
RF amplifiers
Turntables
Antenna masts
Semi-anechoic chambers
Each instrument plays a specific role in obtaining accurate measurements.
Common Causes of EMI Test Failure
Many products fail because of preventable design issues.
The most common causes include:
Poor PCB layout
Inadequate grounding
Long cable lengths
Insufficient shielding
High-speed clock harmonics
Noisy switching power supplies
Weak enclosure design
Improper filtering
Ground loops
Poor connector design
Addressing these issues during design greatly improves the likelihood of passing the first compliance test.
Best Practices for a Successful EMI Testing Procedure
Manufacturers can improve first-pass success by following these recommendations:
Consider EMC requirements early in product development.
Perform multiple rounds of pre-compliance testing.
Use high-quality shielding and filtering components.
Minimize high-speed loop areas on PCBs.
Maintain good grounding practices.
Keep signal return paths short.
Document all test configurations.
Work with experienced EMC engineers.
Select an accredited testing laboratory.
Validate design changes before certification.
A proactive approach reduces project costs and shortens time to market.
Industries That Require EMI Testing
EMI testing is essential across many sectors, including:
Consumer electronics
Telecommunications
Automotive
Aerospace
Defense
Medical devices
Industrial automation
Renewable energy
IoT devices
Smart home products
Robotics
Laboratory equipment
Each industry follows standards tailored to its operating environment and regulatory requirements.
Benefits of Following a Proper EMI Testing Procedure
A well-executed EMI testing process offers numerous advantages:
Faster regulatory approvals
Improved product quality
Reduced engineering changes
Better customer satisfaction
Lower warranty costs
Increased product reliability
Easier access to international markets
Enhanced brand reputation
Lower risk of product recalls
For manufacturers, investing in thorough EMI testing often results in lower overall development costs and a smoother path to commercialization.
Conclusion
A well-planned EMI testing procedure is a vital part of developing safe, reliable, and compliant electronic products. From selecting the correct standards and performing pre-compliance evaluations to conducting radiated and conducted emissions testing, each step helps ensure your device operates without causing harmful electromagnetic interference.
By integrating EMI considerations early in the design process, using proper engineering practices, and partnering with an experienced accredited testing laboratory, manufacturers can reduce compliance risks, accelerate product certification, and confidently launch products in global markets. As electronic systems continue to grow in complexity, following a structured EMI testing procedure remains one of the most effective ways to achieve long-term product performance, regulatory compliance, and customer trust.